Adding FareHarbor links and embeds to your website
Last updated: May 21, 2025
We can help you! Our team is happy to update your website with the most effective booking widgets for your activities – just drop us a line. However, if you’d like to add a FareHarbor widget yourself, this page will show you how.
Click here to view all booking options available for your website
You can insert a variety of FareHarbor widgets, also called embeds, into your website using our embed generator tool. Use this tool to create as many custom widgets as you’d like, then simply copy and paste the generated code into your website. Click into the sections below to learn more.
Please note: the ability to use the embed generator to add links to your website is a tool that is not available for affiliate Dashboards. If you are an affiliate, please send an email to our Strategic Partnerships team at strategicpartnerships@fareharbor.com for instructions on how to receive affiliate links.
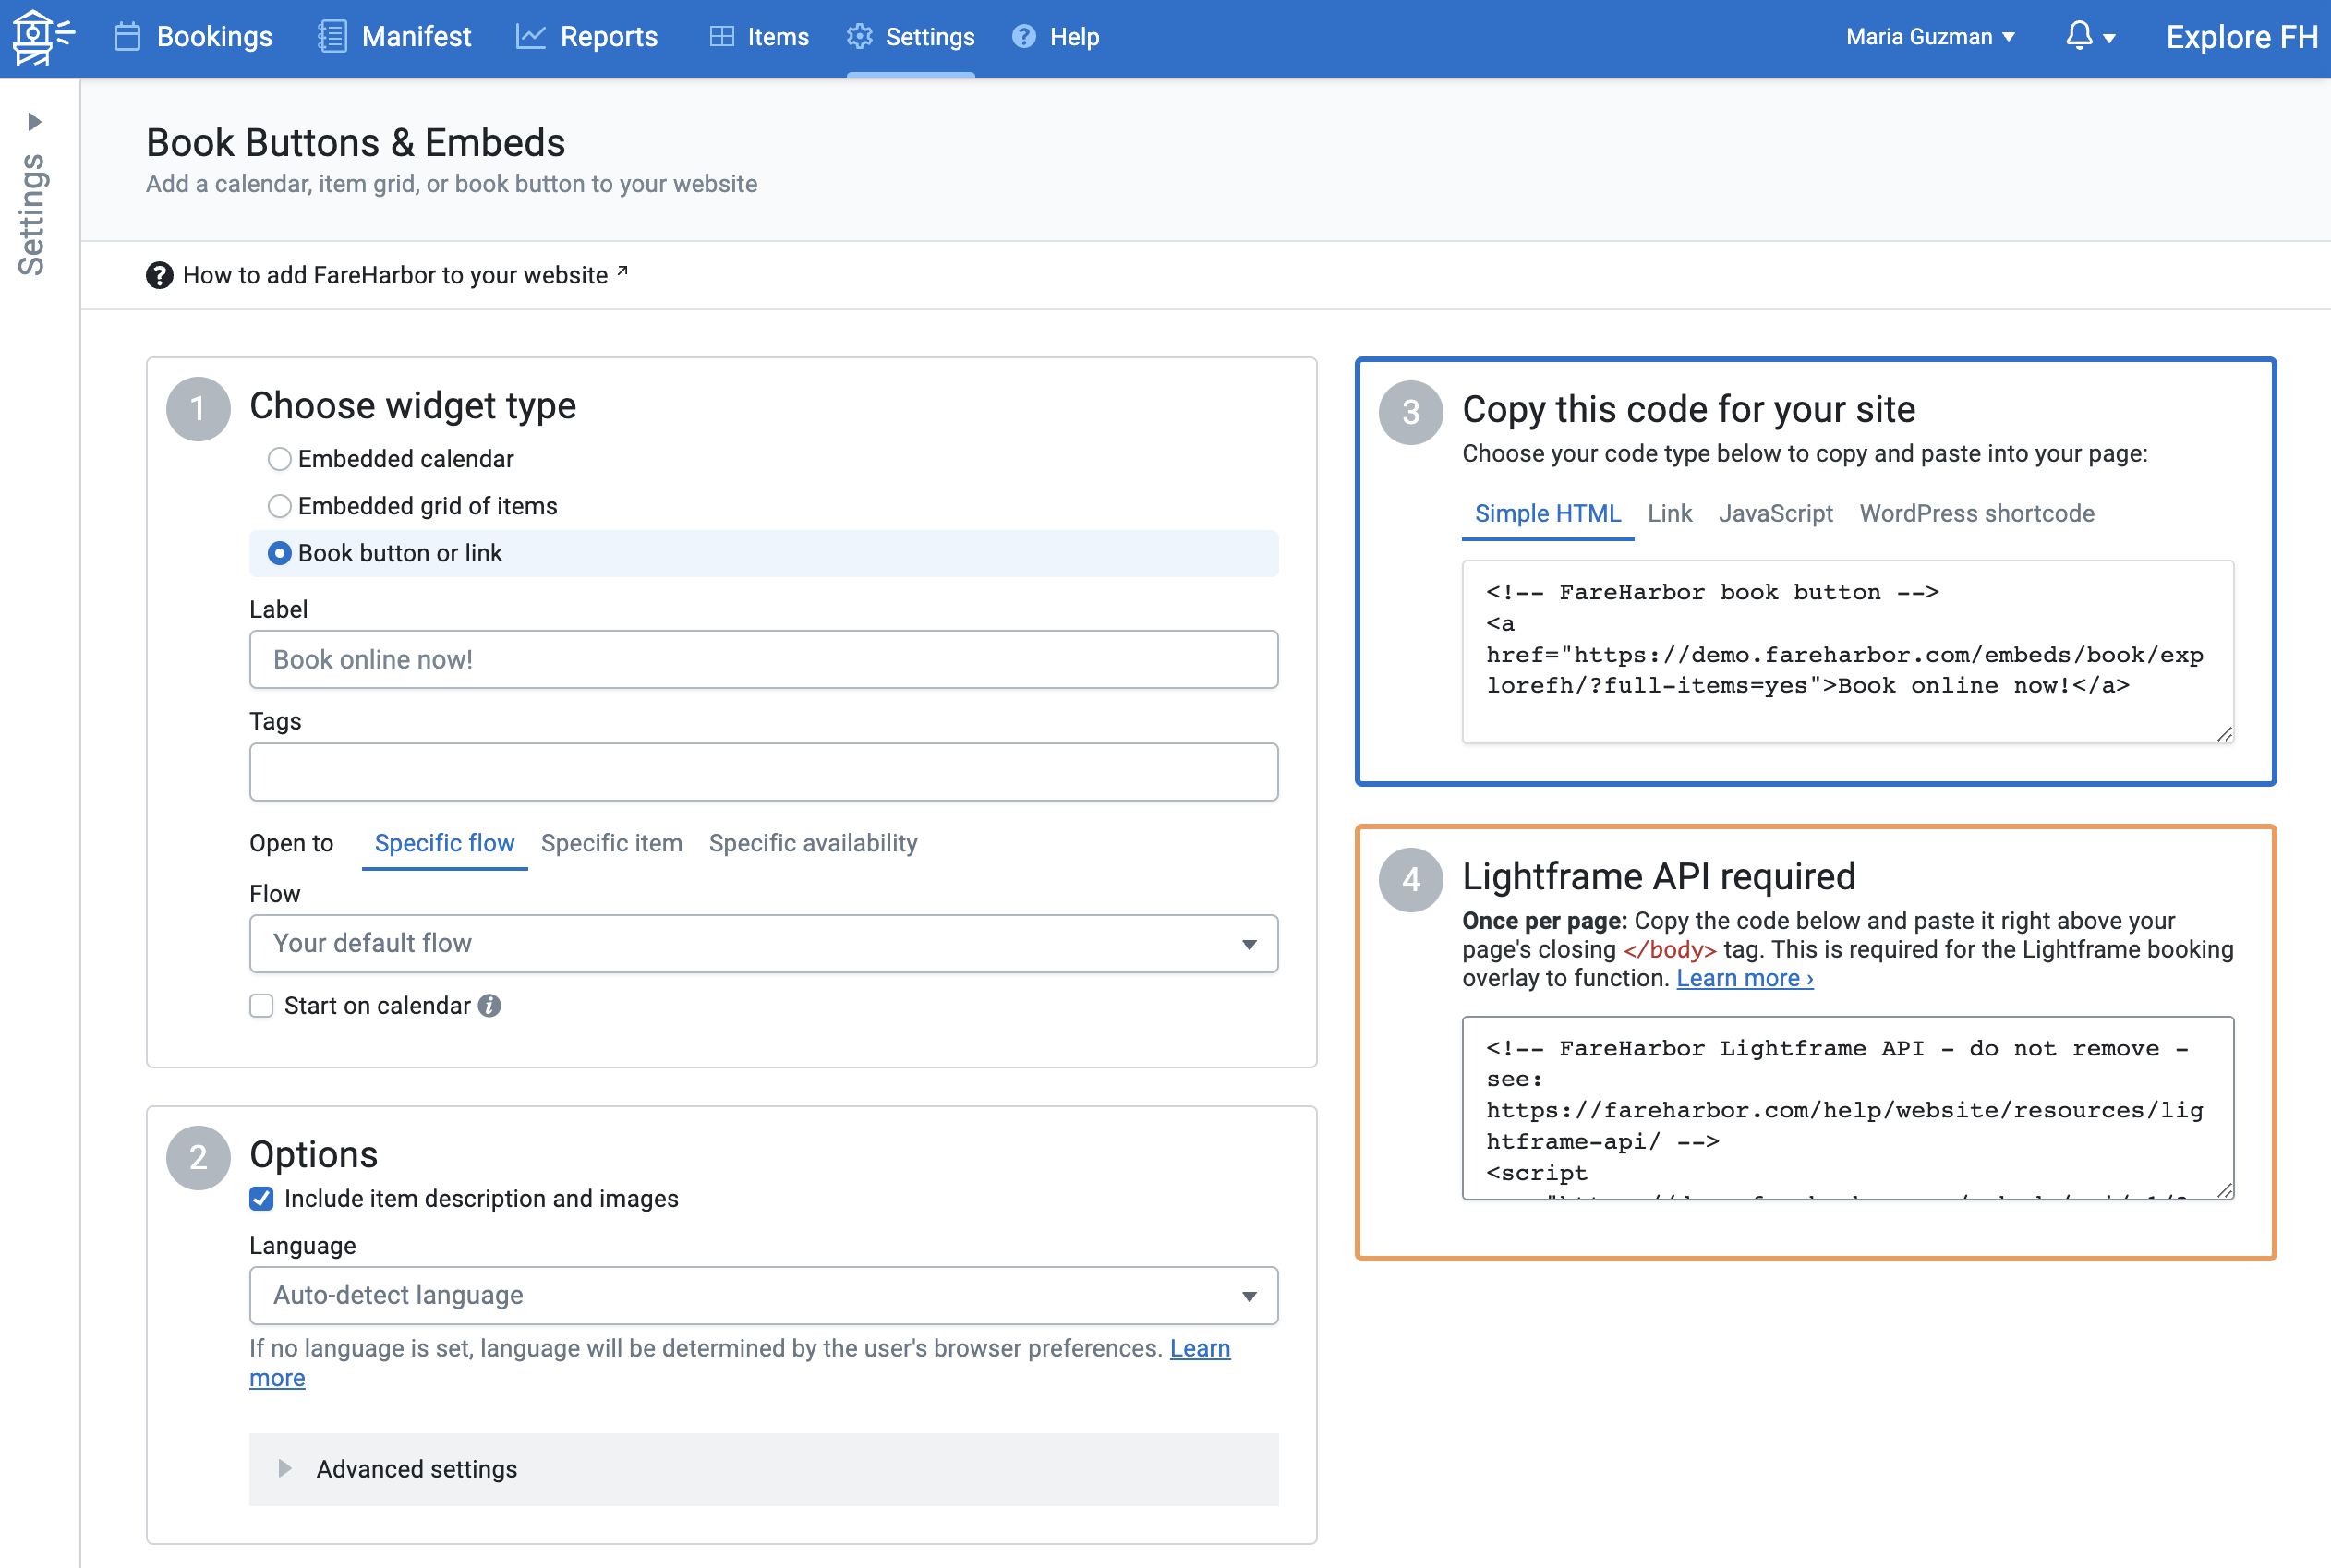
Accessing the embed generator
You can access the embed generator from either your Dashboard Settings or an individual item’s settings. Keep in mind that when accessing the tool from an item’s settings, you’ll only be able to generate widgets for that specific item.
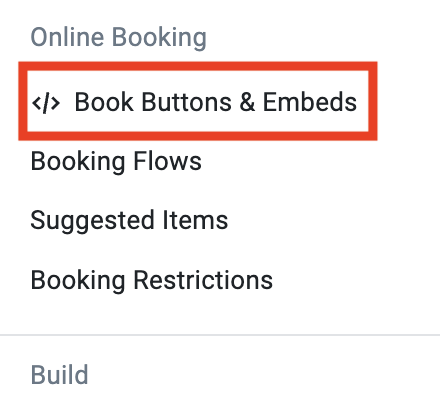
To access the embed generator from your Dashboard Settings:
- Go to the Settings section of your Dashboard.
From the Settings menu, select Book Buttons & Embeds.
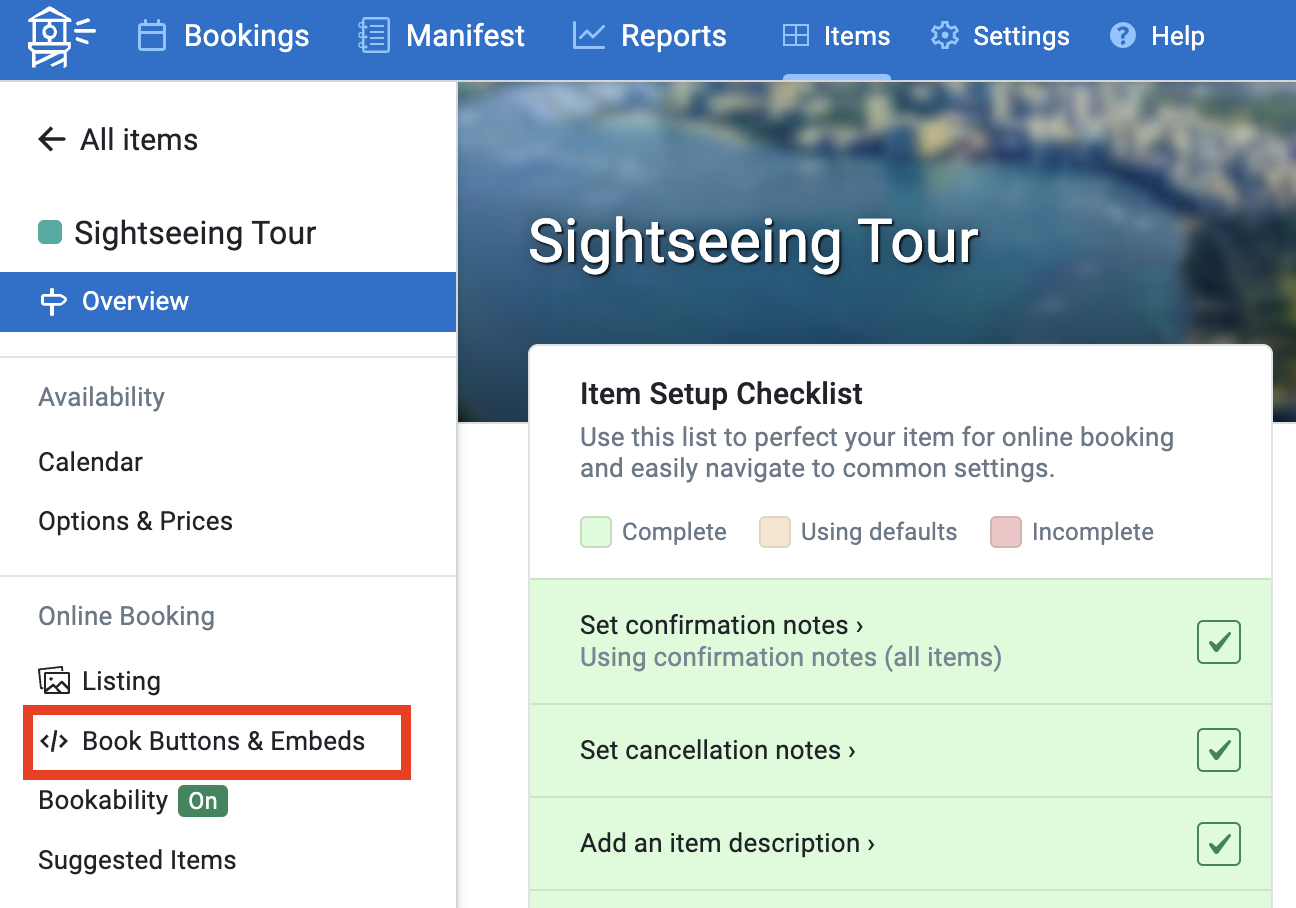
To access the embed generator from an item’s settings:
- Go to the Items section of your Dashboard.
- Select an item.
Select Book Buttons & Embeds from the sidebar or index page.
Step 1: Choose your widget
First, choose which type of widget you want to insert. Each option is designed to open FareHarbor’s Lightframe booking process, allowing the customer to complete their booking right from your website. Read more about each option below.
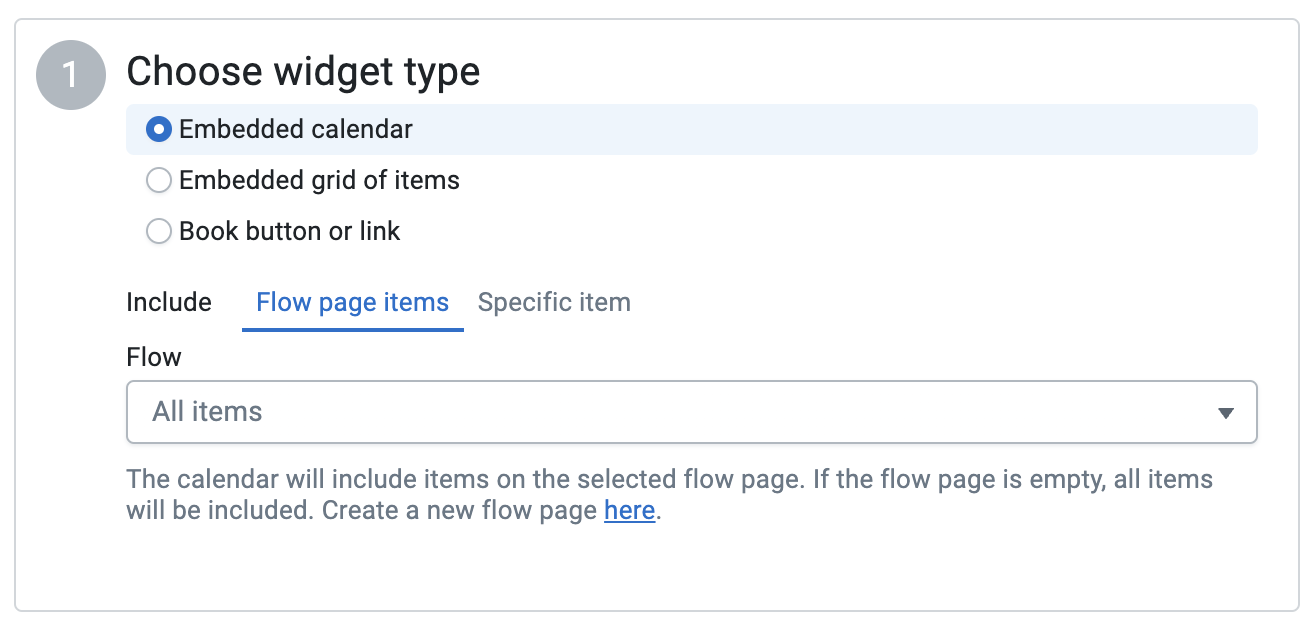
Embedded calendar
This is an availability calendar for one or more items that can be inserted directly into a page. This way, online users can easily see what’s available to them, without having to click on a link or button.
The calendar is responsive, changing its size to fit the space it’s in. This makes the booking process seamless for customers whether they’re on a computer, tablet, or smartphone.
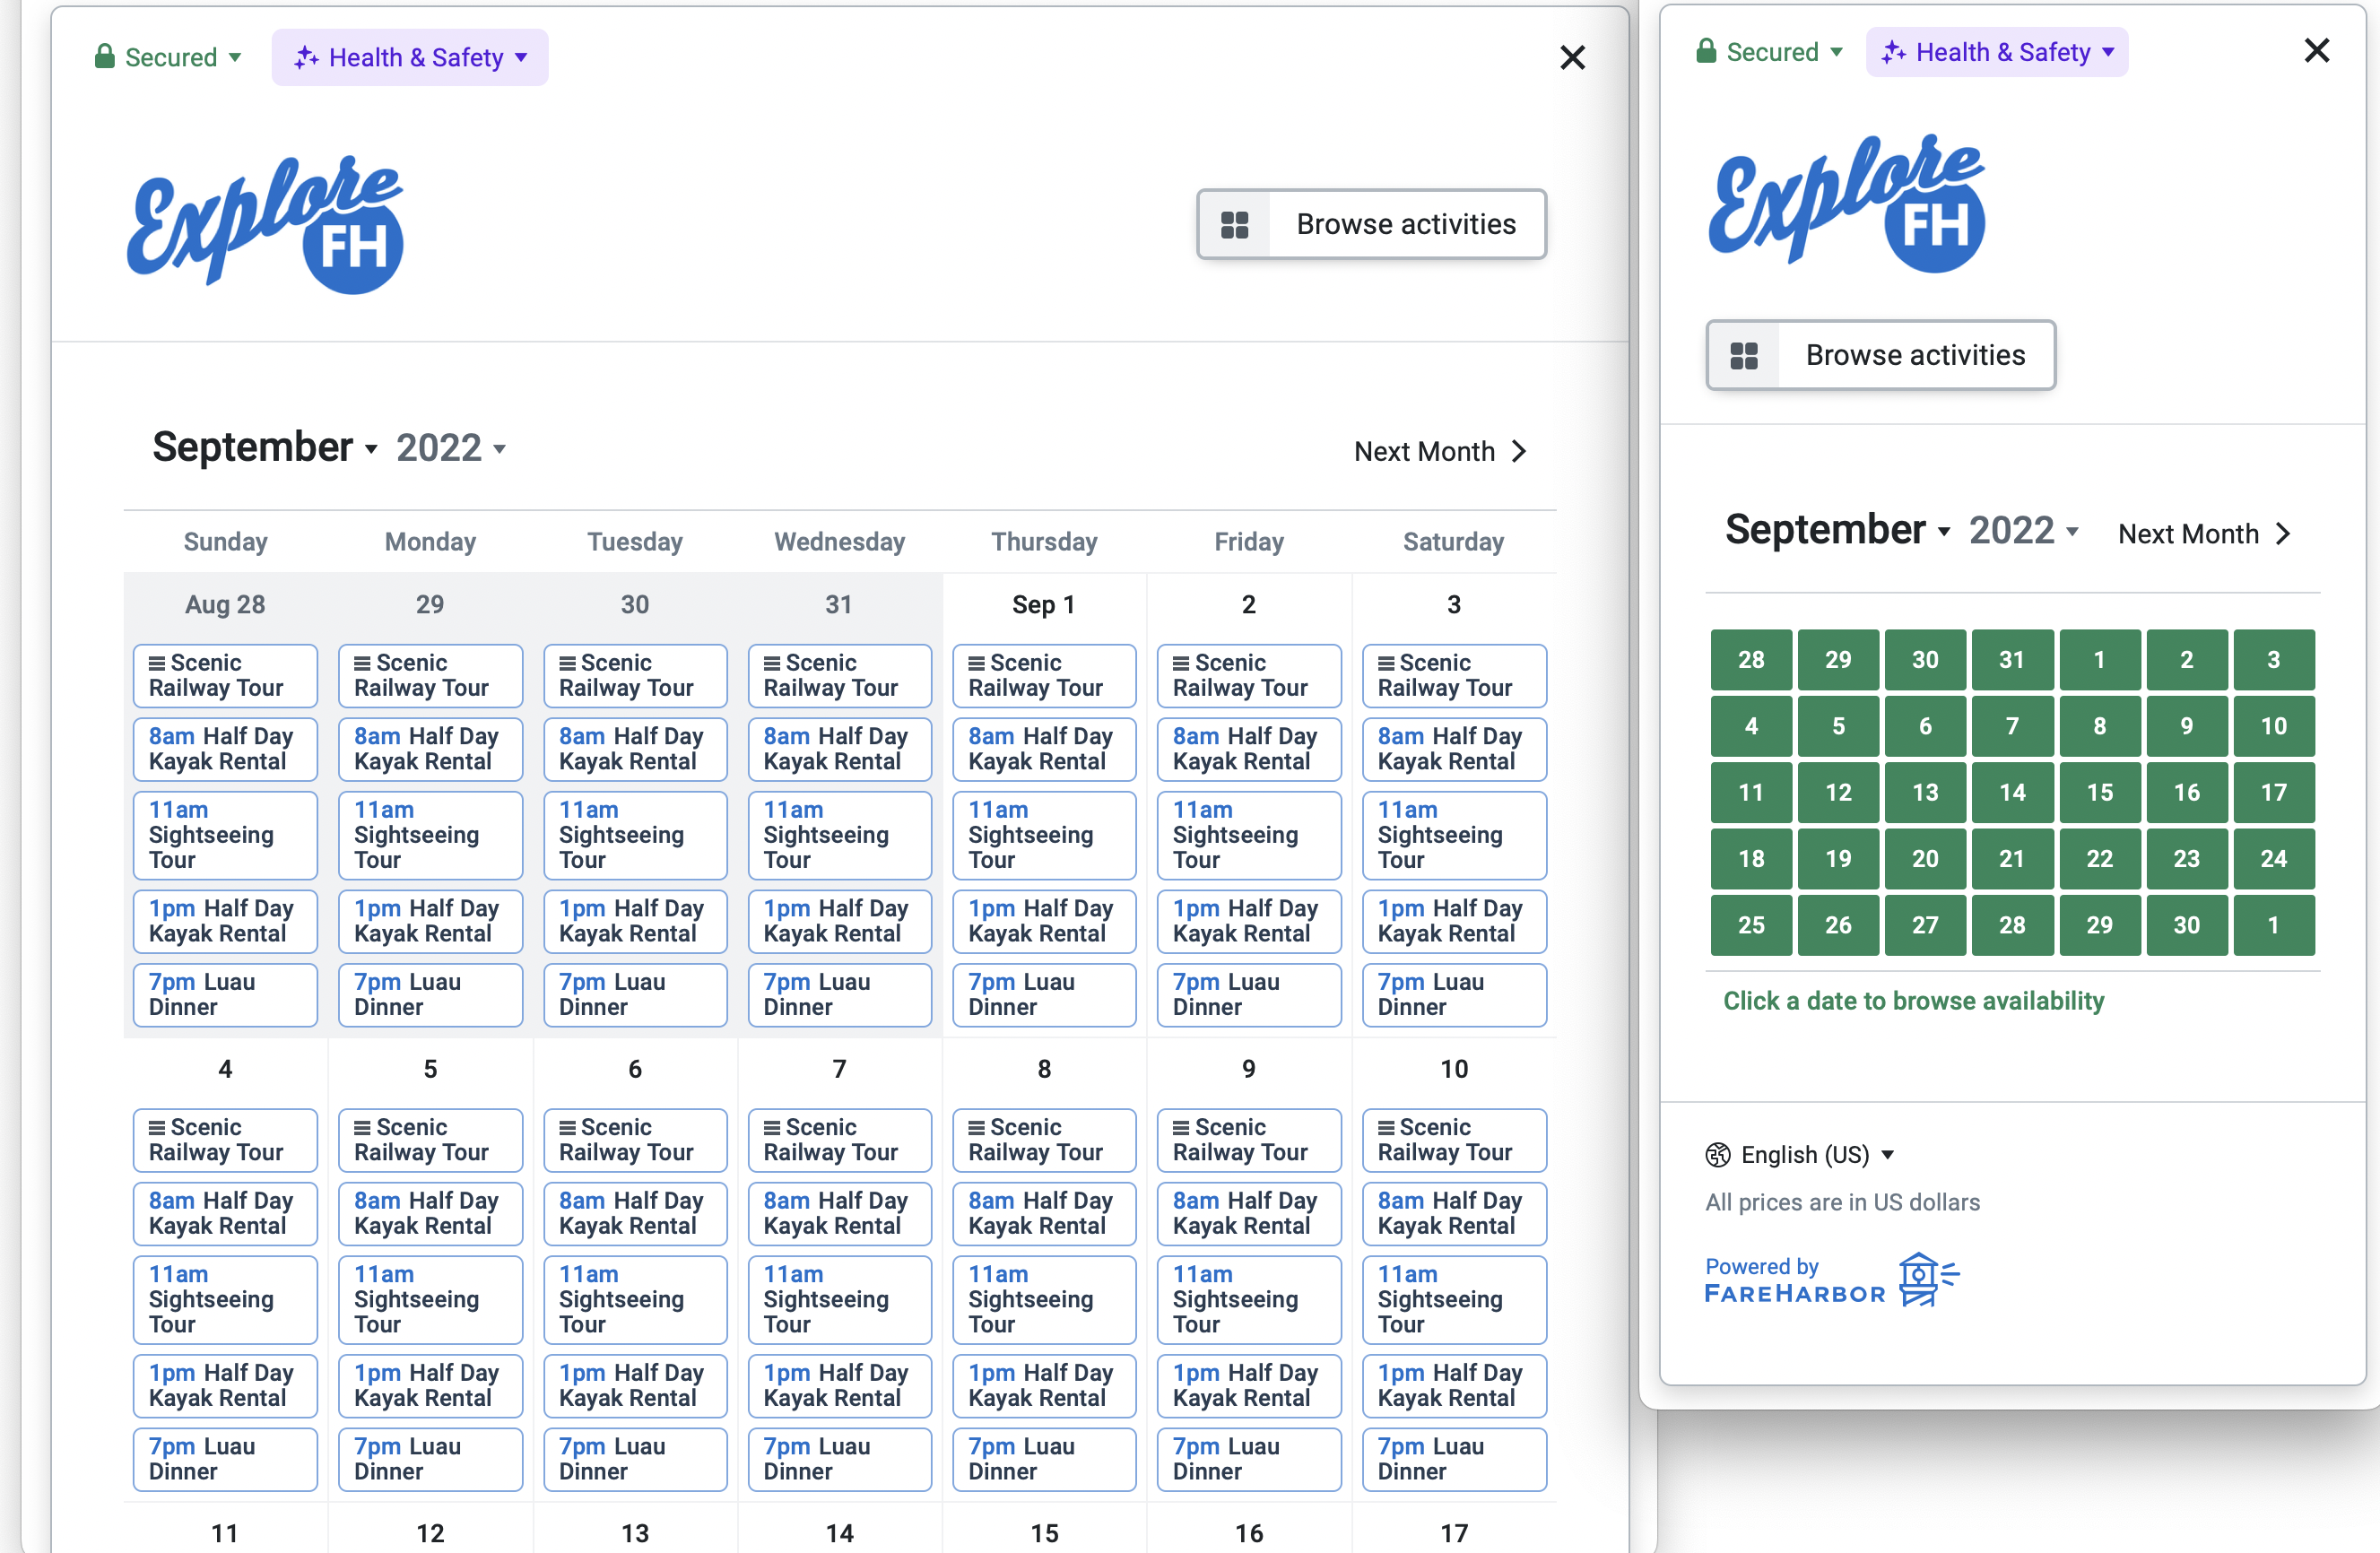
Calendar options
By default, the calendar will include all of your items. To include a specific set of items, choose from an existing flow and flow page, or create a new flow with your desired group of items. Learn more about flows.
You can also generate a calendar for a single item. When doing this, you’ll also have the option to choose what other activities the customer can access when navigating through the booking process, using flows and flow pages. If no flow is selected, the default will be used.
Please note that it is impossible to have a calendar link to the item description. Selecting an availability from the calendar view will always lead to the book form for that availability.
Embedded grid of items
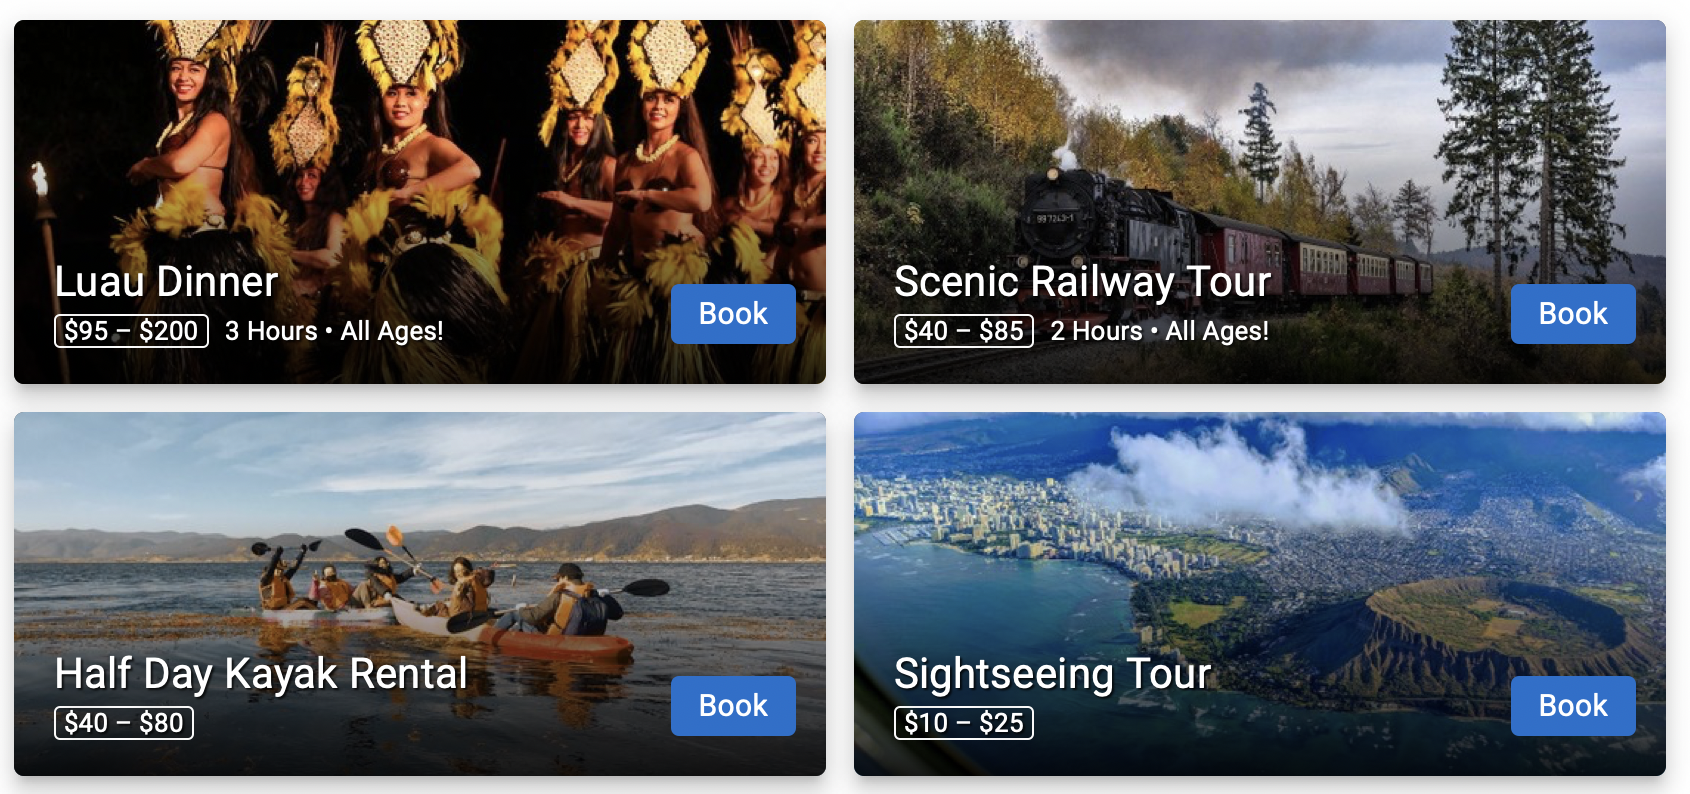
This option creates a clean, visually attractive display of items embedded into a webpage. Select a flow and flow page to determine which items to display.
Book button or link
This option lets you generate a custom button or text link, which will then take the customer directly to the booking process when clicked. You can also generate a plain URL that will open the Lightframe with our Auto-Lightframe feature.
Book button/link options
Enter your button or link text in the Label field, then choose what the link should open to: a specific flow, item, or availability.
Similar to the embedded calendar option, you’ll also choose what other activities your customers can access when navigating through the booking process using flows and flow pages.
Note: To open the Lightframe from a button or link, you’ll need to also include the Lightframe API script on your page or, if you have a WordPress site, have the WordPress Plugin installed.
Step 2: Customize your embed
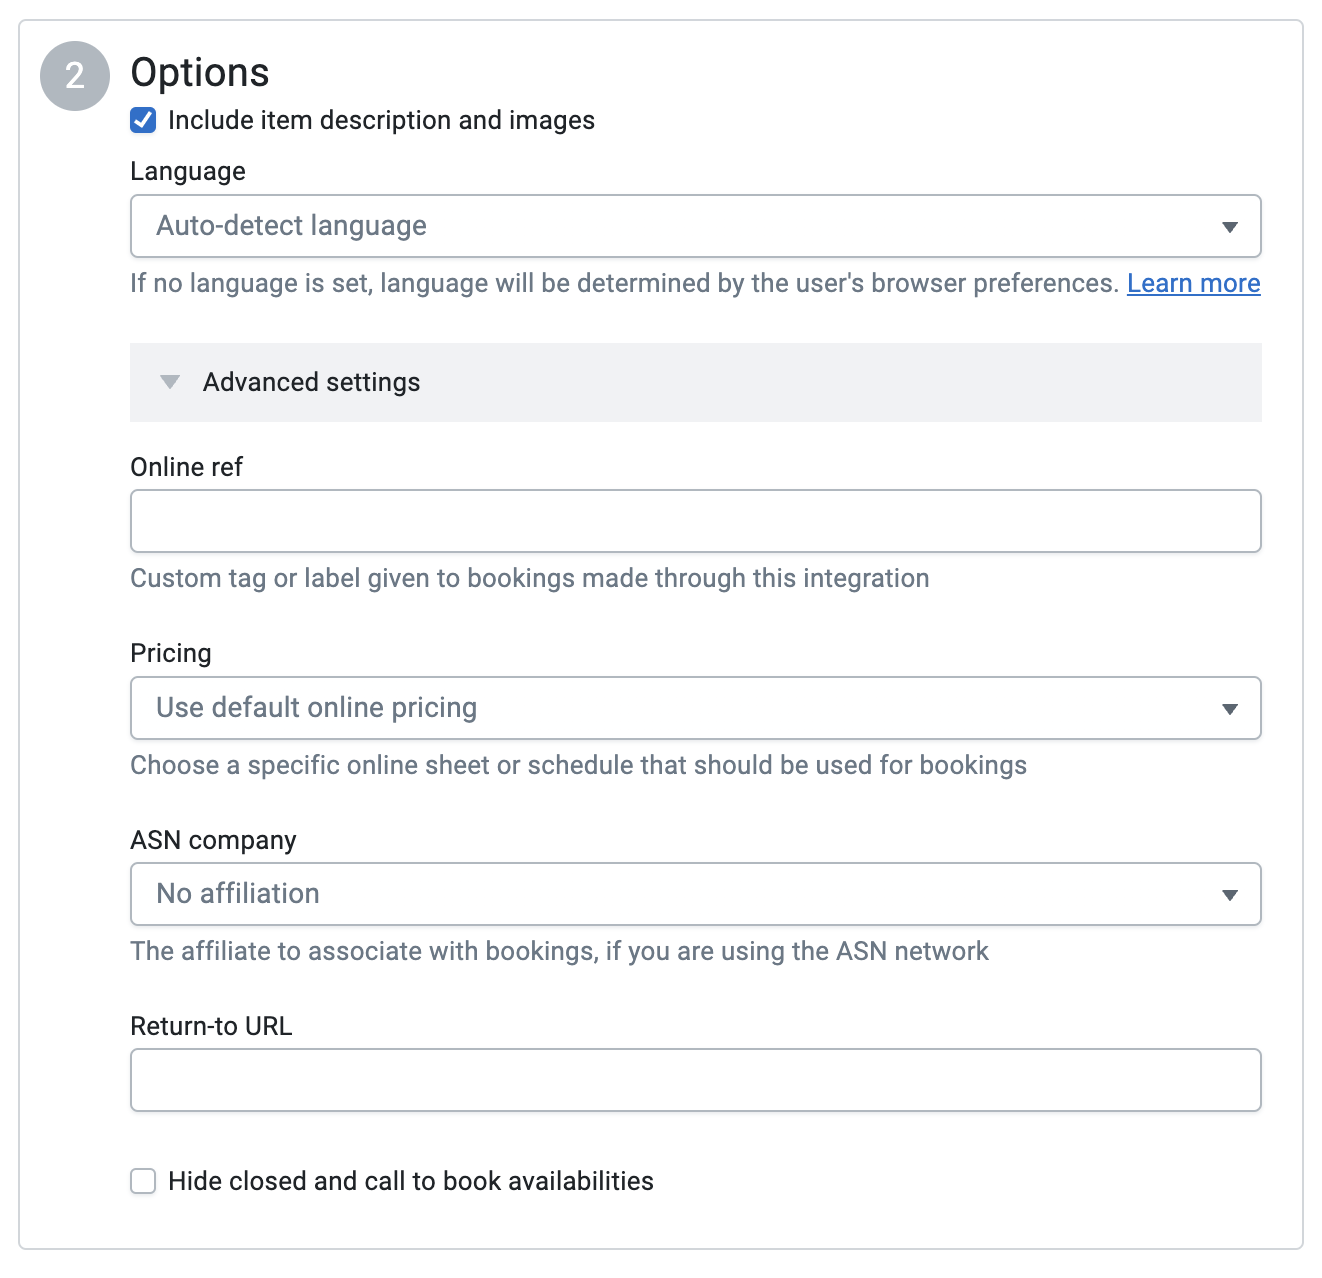
Note: Depending on your Dashboard setup, you may not see all of these options.
Include item description and images: Choose to show item description and images when an online user clicks into an activity. It’s best to use this option when your embed is on a page that does not already include descriptions. If this is unchecked, it will display the calendar view.
Language: If applicable, choose the language that the booking process will be shown in (customers can always change their language using the menu at the bottom of the page). The options in this list are based on which languages are supported in your settings.
Please note the Lightframe will auto detect the customer’s preferred language through their browser settings, so it is not necessary to hardcode the language on the link.
Advanced settings
Hide closed and call to book availabilities: Only display availabilities that are bookable online. Availabilities with bookability status set to “Closed and Call to book” will be hidden from the calendar instead of displaying as “Call to Book”.
Online ref: Enter a Ref ID (such as confirmation email, homepage, abc-concierge.com) that describes where the embed, button, or link is being used. This will be tracked in your Dashboard so you can see where your bookings are made. Including a ref is highly recommended.
Price sheet: Choose which online price sheet should be used when online customers create a booking. Note: this option is only available if you have two or more online price sheets.
ASN company: If your company works with affiliates, this is where you can choose an affiliate to identify which company the booking came from.
ASN ref: For companies working with affiliates, the ASN Ref is an optional attribute you can use to collect additional information about a booking. Note: this option will only be available if an ASN company has been entered above.
Step 3: Copy your code
As you set your settings, the embed code will be automatically generated in the text box to the right. Click anywhere on the code to highlight it, then copy and paste into the desired page.
During this step, it’s important to choose the correct code type:
- The Simple HTML code (only available for book buttons and links) is most commonly paired with the Auto-Lightframe script, but can also be used if your website is unable to use the Lightframe API. Classes can be added to the html elements in conjunction with our stylesheet to create FareHarbor buttons.
- The Link code (only available for book buttons and links) can be used on Squarespace or other template-based website builders. In these cases, it’s best used with the Auto-Lightframe script. You can also include this code in emails, non-website (non-HTML) documents, or social media sites like Facebook or Twitter.
- The Javascript code is used for all websites where Auto-Lightframe is disabled.
- The WordPress shortcode is used for WordPress sites with the FareHarbor plugin installed only. If the WordPress plugin is installed and configured correctly, these can be used to display buttons from any text editor.
Note: Without the Auto-Lightframe feature, both the Simple HTML and Link types will take online users to a direct-access page instead of the Lightframe booking process. Learn more.
Step 4: Additional requirements
Depending on what options are selected, an additional step may be required before the embed, book button, or link can work correctly.
Lightframe API required: If you’re adding a book button or link that will open the Lightframe using Javascript, the additional code in this step is required for opening the Lightframe properly. Copy and paste the code right above the page’s closing “ tag.
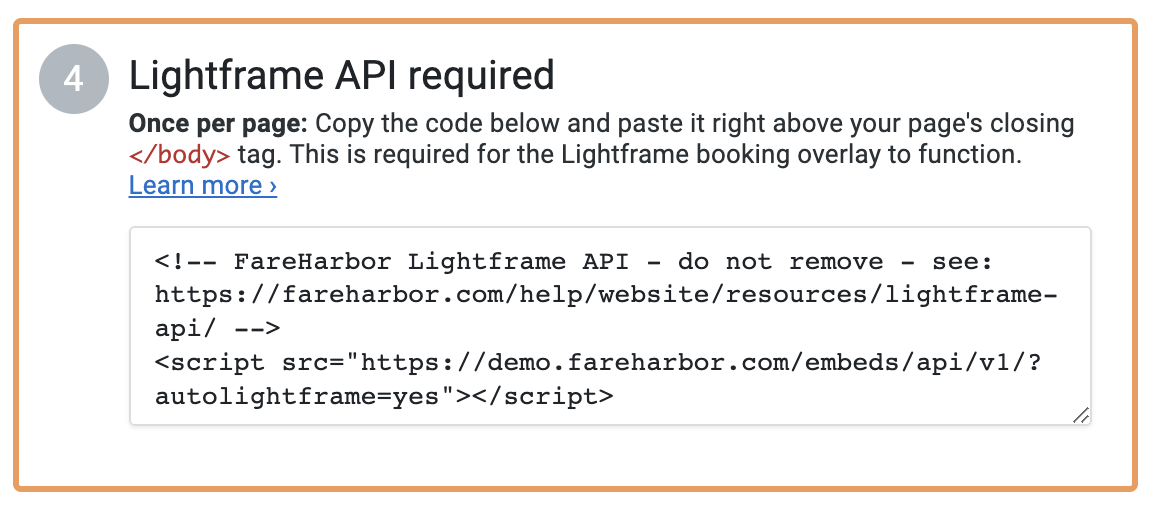
Alternatively, if you have the ability to include the above code in the body of a single template that is included on every page of your website, the code can be added to that template, without having to include it on every page.
Learn more about the Lightframe API
WordPress plugin required: If generating a WordPress shortcode, you will need to make sure that version 3.0.1 or higher of the FareHarbor WordPress plugin is installed on the website.

Frequently Asked Questions
What is Auto-Lightframing?
The Lightframe API can open the Lightframe for all FareHarbor links, even those without an onclick attribute set. This functionality is automatically included the Lightframe API src as autolightframe=yes:
<!-- FareHarbor Lightframe API - do not remove - see: https://help.fareharbor.com/api/lightframe-api/ -->
Just insert the above script source into the page right above the closing “ tag, and then use your site builder interface to insert normal links and buttons.
If using a WordPress website: Version 3.1 of the WordPress plugin adds support for Auto-Lightframing. Check “Enable auto Lightframing” in the plugin settings.
Why won’t my links open correctly?
Double-check that you’ve selected the correct options by following the steps outlined on this page, and that your links match the generated code.
If you want the link to display an item’s images and description, for example, you’ll need to ensure you’ve selected Display item description and images in the Options section of the embed generator, and that there is a query at the end of your link reading full-items=yes.
If you only have one item on your FareHarbor Dashboard and you would like to display the item’s images and description, select your item from the list (instead of selecting All items).
Can I change the color or style of the embedded calendar to match my website?
Although there are several ways to modify the content of your embedded calendar, the calendar stylesheet itself (colors, fonts, etc.) is not currently customizable.